'What have you learnt about technologies from the process of constructing this product?'

What we learnt from using our Panasonic HDC-SD60 camera?

Using this camera, we learnt how to manually and automatically take shots in-focus and out-of-focus, expanding our composition technique. We felt that this feature on the camera allowed us to take our editing a step further, as this made it even more fairly obvious in terms of the power and superiority of our characters in our opening sequence in specific scenes, from the altered concentration. An example of where we altered the concentration of our characters is shown below:
Problems?
Despite learning features of the camera which helped us improving our opening sequence, we did have difficulties with controlling lighting while using this camera. As we knew, lighting was a crucial aspect of our film especially where our genre is arguably a thriller, we needed to set a 'night' mode environment. Even though our opening sequence was filmed during the evening, we still had problems controlling light as we avoided using indoor lighting. This lead to insufficient amount of light, where our characters was not visible in some scenes and where we did use indoor lighting it was far too bright, which wasn't suitable in our case. We therefore then used a small lamp light in the background during filming, which fairly went well as this resolved our problems with lighting as well as set a nice tone colour.
After all, when it came to editing we was fairly happy with the lighting as previously mentioned, but in some scenes we discovered there was still issues with lighting in some scenes. Specific shots in which we repeated, the lamp light was positioned in different positions in other shots, which therefore meant there was mixed light tone and background lighting when putting our opening sequence together, making it look unprofessional and obvious. This further issue was then dealt while editing using Final Cut Pro, where we used 'match colour'. This allowed us to match the same light of another shot and copy it in the required scenes. The video below shows the altered feature of 'match colour' on Final Cut Pro.
Tripod:
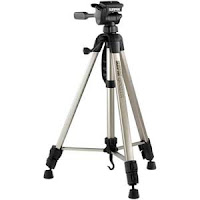
We also used a tripod to control different camera shots, compositions, movements and angles. We believe that using a tripod was essential during the process of filming our opening sequence, as it helped us take a variety of camera shots, movements, compositions, angles as well as improving our technique. For example, framing - making it more easier and less time-consuming when using a tripod as it reduced the amount of repeated shots required effectively helping us perfecting shots. Also, using the tripod helped us adjust the height and angle of the camera, which was crucial while taking specific shots. Examples, are shown below:

Sound
For Sound, we used Final Cut Pro for editing. We strongly believe that sound made a significant contribution and impact towards our opening sequence, as we avoided using voiceovers. Therefore, adjustments and editing with sound was significantly important as it is highly reflected to the genre of our film.
What we learnt when editing sound, using Final Cut Pro?
When using Final Cut Pro, we had to ensure that specific background sound was played at specific timings of the film., where appropriate. Doing so, we learnt how to copy and paste certain aspects of the soundtrack, as well as cutting unnecessary parts of the track. We also learnt how to change sound pitch levels, where we had to ensure sound levels where generally balanced and smooth when moving to one shot to another.
Camera shots edited
Using Final Cut Pro, this allowed us to manipulate and edit our camera shots to another level and at the same time expanding our editing skills. We where fairly unaware that we where able to use certain editing skills when filming, and only noticed when we started to get grips onto Final Cut Pro. When using Final Cut Pro, for some camera shots filmed in our opening sequence, we decided to edit our camera shots which we thought would make it look even better.
For example:

We also used a tripod to control different camera shots, compositions, movements and angles. We believe that using a tripod was essential during the process of filming our opening sequence, as it helped us take a variety of camera shots, movements, compositions, angles as well as improving our technique. For example, framing - making it more easier and less time-consuming when using a tripod as it reduced the amount of repeated shots required effectively helping us perfecting shots. Also, using the tripod helped us adjust the height and angle of the camera, which was crucial while taking specific shots. Examples, are shown below:

For Sound, we used Final Cut Pro for editing. We strongly believe that sound made a significant contribution and impact towards our opening sequence, as we avoided using voiceovers. Therefore, adjustments and editing with sound was significantly important as it is highly reflected to the genre of our film.
What we learnt when editing sound, using Final Cut Pro?
When using Final Cut Pro, we had to ensure that specific background sound was played at specific timings of the film., where appropriate. Doing so, we learnt how to copy and paste certain aspects of the soundtrack, as well as cutting unnecessary parts of the track. We also learnt how to change sound pitch levels, where we had to ensure sound levels where generally balanced and smooth when moving to one shot to another.
Camera shots edited
Using Final Cut Pro, this allowed us to manipulate and edit our camera shots to another level and at the same time expanding our editing skills. We where fairly unaware that we where able to use certain editing skills when filming, and only noticed when we started to get grips onto Final Cut Pro. When using Final Cut Pro, for some camera shots filmed in our opening sequence, we decided to edit our camera shots which we thought would make it look even better.
For example:
Title
For our opening sequence we used a template from Final Cut Pro to create our main title. We thought the template was appropriate for our theme and genre of the film, as we was initially looking for a very similar idea. We initially wanted our main title to appear after a few seconds after the gun shot where at first blood splatter appears; where on Final Cut Pro this was already created, therefore we was fairly happy with it. However, we wasn't entirely pleased with the colour theme of the template as we ideally wanted black as a background colour and red as the blood splatter. After a few attempts using a variety of software such as iMovie HD and Motion, we where still unable to change the main title colours, resulting us to leave it how it is. We made this decision, as the animation of the main title template looked highly professional and made a significant impact for an ending in terms of the genre and concept of our film; and alternative title ideas was not as good due to lack of profession and difficulties creating and editing our main title.
Credits
We used Motion to create our credits in our film. This software helped us to be more creative and thoughtful with our credits, as we believe this also plays a big part of a film. Motion helped us change the movements and transitions of credits as well as timing by using the timeline, where we believe it was fairly easy to function. It contained a variety of font and font effects in which we was satisfied with, therefore a substitute software for our credits was not required.
Production logo indent:
Whilst creating our Production indent, we used LiveType. When using LiveType, we learnt how to create animation effects and manipulate the font using a range of movements and effects. This was also fairly easy to understand and function and we liked the final outcome of the indent. Despite the indent not fully meeting our demand, we didn't want to consume far too much time on our production logo indent as we believe credits and title where more of our priority.
All of our editing was constructed, using a Apple Mac.


No comments:
Post a Comment