Monday, 8 April 2013
Feedback to our Opening Sequence
We posted our film on the social networking website Twitter. After posting our opening sequence people responded to our opening sequence. Below are some of the responses and interactions we got on twitter.


From the images above you can see our opening sequence was being promoted through some of our followers re-tweeting our opening sequence; sharing it with other people who also follow them. Also people 'favourited' our post (which essentially means they like it'. Also some people replied to our post telling us what they thought.
We also screened our opening sequence to some friends and family and got feedback on what they liked about the film and what they thought we could do better on.
Below are the comments we received:


We also screened our opening sequence to some friends and family and got feedback on what they liked about the film and what they thought we could do better on.
Below are the comments we received:

Wednesday, 3 April 2013
Evaluation - Q7
''Looking back at your preliminary task, what do you feel you have learnt in the progression from it to the full product?"
Preliminary task:
Before we started our main coursework, we had to carry out a preliminary task to familiarise ourselves with the camera and tripod as well as understanding some basic editing and sound techniques. Doing so, we learnt how to get some grip with the camera work by learning how to take a variety of camera shots and angles.
Below is our preliminary task:
Camera shots, angles and editing:
In our opening sequence, we reflected back on our preliminary task; and decided to use some editing techniques which we used previously. One of these was a match on action. We found that using a match on action would demonstrate a characters power and authority. This was done in our preliminary when we cut into a close-up on our character as she walked in through the door. We did this again in our opening sequence, as we believed our character in our opening sequence had a similar role, where also our character seemed powerful from his first appearance. This was used, so that when cutting from a mid-shot to a close-up, it would not be noticeable to the audience and would be subtle.
This is shown below:
From our preliminary task, we used a similar shot technique where we used a high angle shot for our opening sequence. We got inspiration from our Preliminary to use this technique, where we used a aerial shot, as we believed it emphasised more suspense/drama:


From our Preliminary task, we believe that the framing wasn't straight. After viewing this we realised this was because of our tripod. Before filming for our opening sequence we attempted to understand the tripod more, and make sure we knew how to use it properly so that our framing would be perfect, effectively making our shots better.


Sound:
For our preliminary task, we used iMovie HD. Whilst with our opening sequence we used Final Cut Pro 10. By changing software we were able to edit and manipulate sound a lot better than in our preliminary. In our preliminary we had one running soundtrack with one final sound effect at the end. Whereas, in our opening sequence as well as using one running soundtrack we added a variety of sound effects. Also with the one running soundtrack we cut it and altered levels of volume where appropriate, as explained in our previous question.

Mise-en-scene:
Despite progression from our preliminary task in terms of editing, camera shots/angles and sound we felt that we most progressed in mise-en-scene. We believed for our opening sequence, location, props and costume was the most effective progression because it distinctively identified our film genre and target audience.
Location -
Preliminary task: In terms of location for our preliminary, we were very underwhelmed with locations to film, as we were filming at school. With lessons going on and interruptions from other students, this made it increasingly difficult to find an ideal location to film. Our location for our preliminary did not highlight our genre as aspects such as lighting and the fact that we filmed in a locker room would not help the audience distinguish our preliminary genre, as the location is not related to the ideas and themes portrayed by the actors.
Opening sequence: For our opening sequence, as we had more time to plan for our settings, this helped us outline and evaluate the ideal location for us to film. We used a variety of settings and upon finding the perfect one, we used every aspect of the setting that we could which would be suitable for our film. This includes: the elevators, the corridor, the bathroom, the passage, the kitchen and the living room. By being able to use all these areas this helped us portray our genre better than in our preliminary task.
Props -
Preliminary task: In our preliminary task we had a limited amount of relevant props which would feature in a film of that genre, also some of the props that were available, did not significantly establish the roles of our characters so were in the end not used at all.
Opening Sequence: In our opening sequence, we had more time to plan and due to this we studied our influences further to see what appealed to our target audience and what types of props were used in those films. From our research we were able to purchase specific props which were ideal to a film in our chosen genre. These included: Fake Blood, Fake Gun, Fake Knife, Mask and Keys.
Costume -
Preliminary task: As we filmed our preliminary task whilst in our media lesson, we were unable to use appropriate costume for our characters, due to not having a choice of what our actors were wearing. The most we could do was let our actors borrow items of clothing such as the blazer and the hoodie from other students. Doing so, the costumes were not an accurate interpretation of the characters role.
Opening Sequence: As previously mentioned with the amount of time available we were able to do in depth research into the typical costumes which were used by films in our genre. Due to this, we were able to be very specific with what our actors were wearing and made the dress code clear to the actors which helped them portray their roles better.
Tuesday, 26 March 2013
Evaluation - Q6
'What have you learnt about technologies from the process of constructing this product?'

What we learnt from using our Panasonic HDC-SD60 camera?

Using this camera, we learnt how to manually and automatically take shots in-focus and out-of-focus, expanding our composition technique. We felt that this feature on the camera allowed us to take our editing a step further, as this made it even more fairly obvious in terms of the power and superiority of our characters in our opening sequence in specific scenes, from the altered concentration. An example of where we altered the concentration of our characters is shown below:
Problems?
Despite learning features of the camera which helped us improving our opening sequence, we did have difficulties with controlling lighting while using this camera. As we knew, lighting was a crucial aspect of our film especially where our genre is arguably a thriller, we needed to set a 'night' mode environment. Even though our opening sequence was filmed during the evening, we still had problems controlling light as we avoided using indoor lighting. This lead to insufficient amount of light, where our characters was not visible in some scenes and where we did use indoor lighting it was far too bright, which wasn't suitable in our case. We therefore then used a small lamp light in the background during filming, which fairly went well as this resolved our problems with lighting as well as set a nice tone colour.
After all, when it came to editing we was fairly happy with the lighting as previously mentioned, but in some scenes we discovered there was still issues with lighting in some scenes. Specific shots in which we repeated, the lamp light was positioned in different positions in other shots, which therefore meant there was mixed light tone and background lighting when putting our opening sequence together, making it look unprofessional and obvious. This further issue was then dealt while editing using Final Cut Pro, where we used 'match colour'. This allowed us to match the same light of another shot and copy it in the required scenes. The video below shows the altered feature of 'match colour' on Final Cut Pro.
Tripod:
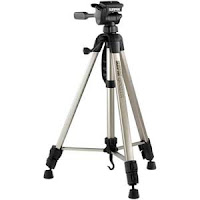
We also used a tripod to control different camera shots, compositions, movements and angles. We believe that using a tripod was essential during the process of filming our opening sequence, as it helped us take a variety of camera shots, movements, compositions, angles as well as improving our technique. For example, framing - making it more easier and less time-consuming when using a tripod as it reduced the amount of repeated shots required effectively helping us perfecting shots. Also, using the tripod helped us adjust the height and angle of the camera, which was crucial while taking specific shots. Examples, are shown below:

Sound
For Sound, we used Final Cut Pro for editing. We strongly believe that sound made a significant contribution and impact towards our opening sequence, as we avoided using voiceovers. Therefore, adjustments and editing with sound was significantly important as it is highly reflected to the genre of our film.
What we learnt when editing sound, using Final Cut Pro?
When using Final Cut Pro, we had to ensure that specific background sound was played at specific timings of the film., where appropriate. Doing so, we learnt how to copy and paste certain aspects of the soundtrack, as well as cutting unnecessary parts of the track. We also learnt how to change sound pitch levels, where we had to ensure sound levels where generally balanced and smooth when moving to one shot to another.
Camera shots edited
Using Final Cut Pro, this allowed us to manipulate and edit our camera shots to another level and at the same time expanding our editing skills. We where fairly unaware that we where able to use certain editing skills when filming, and only noticed when we started to get grips onto Final Cut Pro. When using Final Cut Pro, for some camera shots filmed in our opening sequence, we decided to edit our camera shots which we thought would make it look even better.
For example:

We also used a tripod to control different camera shots, compositions, movements and angles. We believe that using a tripod was essential during the process of filming our opening sequence, as it helped us take a variety of camera shots, movements, compositions, angles as well as improving our technique. For example, framing - making it more easier and less time-consuming when using a tripod as it reduced the amount of repeated shots required effectively helping us perfecting shots. Also, using the tripod helped us adjust the height and angle of the camera, which was crucial while taking specific shots. Examples, are shown below:

For Sound, we used Final Cut Pro for editing. We strongly believe that sound made a significant contribution and impact towards our opening sequence, as we avoided using voiceovers. Therefore, adjustments and editing with sound was significantly important as it is highly reflected to the genre of our film.
What we learnt when editing sound, using Final Cut Pro?
When using Final Cut Pro, we had to ensure that specific background sound was played at specific timings of the film., where appropriate. Doing so, we learnt how to copy and paste certain aspects of the soundtrack, as well as cutting unnecessary parts of the track. We also learnt how to change sound pitch levels, where we had to ensure sound levels where generally balanced and smooth when moving to one shot to another.
Camera shots edited
Using Final Cut Pro, this allowed us to manipulate and edit our camera shots to another level and at the same time expanding our editing skills. We where fairly unaware that we where able to use certain editing skills when filming, and only noticed when we started to get grips onto Final Cut Pro. When using Final Cut Pro, for some camera shots filmed in our opening sequence, we decided to edit our camera shots which we thought would make it look even better.
For example:
Title
For our opening sequence we used a template from Final Cut Pro to create our main title. We thought the template was appropriate for our theme and genre of the film, as we was initially looking for a very similar idea. We initially wanted our main title to appear after a few seconds after the gun shot where at first blood splatter appears; where on Final Cut Pro this was already created, therefore we was fairly happy with it. However, we wasn't entirely pleased with the colour theme of the template as we ideally wanted black as a background colour and red as the blood splatter. After a few attempts using a variety of software such as iMovie HD and Motion, we where still unable to change the main title colours, resulting us to leave it how it is. We made this decision, as the animation of the main title template looked highly professional and made a significant impact for an ending in terms of the genre and concept of our film; and alternative title ideas was not as good due to lack of profession and difficulties creating and editing our main title.
Credits
We used Motion to create our credits in our film. This software helped us to be more creative and thoughtful with our credits, as we believe this also plays a big part of a film. Motion helped us change the movements and transitions of credits as well as timing by using the timeline, where we believe it was fairly easy to function. It contained a variety of font and font effects in which we was satisfied with, therefore a substitute software for our credits was not required.
Production logo indent:
Whilst creating our Production indent, we used LiveType. When using LiveType, we learnt how to create animation effects and manipulate the font using a range of movements and effects. This was also fairly easy to understand and function and we liked the final outcome of the indent. Despite the indent not fully meeting our demand, we didn't want to consume far too much time on our production logo indent as we believe credits and title where more of our priority.
All of our editing was constructed, using a Apple Mac.


Evaluation Task 5
How did you attract/address your audience?
Influences -
We began to look at ways to attract/address our audience by first of all looking at our influences. We looked at films in the same genre, which had the same target audience. We then picked out ideas and themes which were re-occurring in these films and implemented them into ours. Below is a short clip of what we looked at and what we found:
From this we were able to find out what appealed to our target audience the most, and how we could establish our film type, its genre and target audience. We looked at costume to begin with. We found out from our influences that a more professional and smart dress code was what all the characters wore in these films and with majority of the films we looked at having a strong male following, we decided this look was the best to go for.
We were also able to identify the props that we should use to make our target audience aware of our film. From the clip above we can see majority of the films which were featured used props such as fake guns and knifes as well as fake blood.
The final aspect we drew from our influences was which themes to include. We found three themes which ran through majority of our influences. The themes of Violence, Murder and Crime. We ensured that we had some features of all three themes, as well as putting in our own ones.
Originality -
We annotated our film to show some aspects of originality which we thought would attract our audience. The annotated film can be found below:
Even though we used our influences to guide us and help us figure out what our target audience want from a film of this genre, we still used original aspects we felt made our film even more effective and would make our target audience very attracted to our film.
We believed our first original aspect which helped us attract our audience was that our location had a full white colouring. From this we believed made our film more interesting as it didn't give away much about the film and gave it a certain depth of mystery. This was perfect for us as we used this to have an unexpected twist and event take place in our film which the audience would not be able to predict. (For example if we were to to decorate our setting to be more run down and dirty, it would be expected by the audience this is not a good place to be and so something bad would be expected to happen.)

Another aspect we really thought stood out was the use of natural sounds such as the door opening and closing, the shoes being taken off etc. We thought these really increased suspense levels as the natural sound was only used in certain points of the film, creating a horror movie feel; in that something might happen at any time.

In addition, another feature of originality we thought we executed very well was changing the dynamic of an everyday routine to make it more sinister and dark. The bathroom scene which features our victim going about cleansing himself of the day, (which most of us do) was made more sinister and dark with the use of fake blood being smeared all across his hands and parts of his clothes. We thought this addressed our audience well as in hinted the film to follow a crime and violence theme; a theme which is very welcomed by our target audience.

Finally, we were especially proud of our use of lighting, we attempted to create a sort of midnight/film noir vibe to come off our film. We thought this would be achievable through the use of chirascuro lighting. We thought the midnight/film noir feel would appeal to our audience as it allows a different type of film which stands out from the rest of the films in its genre as this film type is very rarely used.

Overall we thought however the use of the mask created a sense of a horror style film and helped us achieve a unique selling point in that it crosses over between genres. Moving from a very modern day mystery to a 1940's style film noir, continuing to horror and finishing on a crime film. Very rarely films cross over between genres and we believed we were able to achieve this well and believed it would appeal to our target audience.
Evaluation task 4
'What would be the audience for your media product?'
After our opening sequence was screened to other media students; the other students answered a few questions regarding our media product. One of those questions concerned target audience and who the students thought our main target audience was.
Below is a picture of who the other students thought our target audience was:
Below is a picture of who the other students thought our target audience was:

Evaluation task 3
What kind of media institution might distribute your media product and why?


After screening our opening sequence to an audience, the majority (5/6) groups agreed that our opening sequence would be a wide-appealing film (mainstream). Realistically, we do believe that our film wouldn't make a lot in the box office due to the low costs of the film. Also, we are fully aware our film budget wouldn't be so ambitious as films such as The Dark Knight Rises as they are produced by a bigger film production company, Warner Bros.
Monday, 25 March 2013
Evaluation Task 1
In what why does your media product use, develop or challenge forums and conventions of real media products?
Editing
After filming our opening sequence, we had to do some editing. We had to use a vast amount of different software's to improve our film opening. Using software's such as Final Cut Pro played a major role in our editing as it done most of the job. Features such as trimming, copying, pasting, adjustments with lighting and sound where edited using Final Cut Pro. Also transitions and effects such as the muzzle flash was done using Final Cut Pro. We believe by editing our opening sequence, this emphasised the genre of our film more and help the audience have sense of the storyline in our film. Sound played a big part where we had to adjust sound levels and make sure they flow when moving to different shots. We also had to make sure that different parts of our soundtrack where played in the most appropriate scenes, which increases suspense and interest. Also, having the opportunity of editing helped us use a variety of shot techniques such as the jump cut, which we believe was a really good outcome as we thought having a long scene of our character washing himself up would be fairly boring to watch.

 Lighting using final cut pro.

Credits using Motion.
We used Final Cut Pro for our muzzle flash effect.
We used LiveType for the Production Logo Indent.


Credits using Motion.
We used Final Cut Pro for our muzzle flash effect.
We used LiveType for the Production Logo Indent.
To create the muzzle flash, we done a bit of research on how to create one. Below is a tutorial of how to create one, and by watching this video this helped us to create our own muzzle flash using Final Cut Pro:
Saturday, 23 March 2013
Wednesday, 20 February 2013
Props Part 2
Realistic props make the film seem more professional. To get some of our props looking genuine and realistic we had to alter some of them.


After experimenting with our fake gun, we decided to change it to one we felt was even better due to the fact it seemed for realistic with better features on the gun such as the trigger sound effect. Also, during filming the gun we was initially was going to use was very difficult to see due to the colour of the gun (black) which clashed with our lighting. Therefore, a change in gun was required so that the gun can be seen using brighter colours (silver).


Above were the different stages of painting the gun to make it look like those we see in real life films.
After experimenting with our fake gun, we decided to change it to one we felt was even better due to the fact it seemed for realistic with better features on the gun such as the trigger sound effect. Also, during filming the gun we was initially was going to use was very difficult to see due to the colour of the gun (black) which clashed with our lighting. Therefore, a change in gun was required so that the gun can be seen using brighter colours (silver).

Location
We needed to have a good controlled location to be able to shoot our film. Here we drafted up ideas and concluded the different places we could film our opening sequence and our final decided location.

Here are the final location shots where we have decided to film:


Here are the final location shots where we have decided to film:

Front Door

Passage

Bathroom

Kitchen

Living Room and Kitchen
We decided to pick this location as it was a family members house. This allowed us to feel comfortable whilst filming and the freedom to experiment without causing an inconvenience and without the fear of being told we were not allowed to film. Also the flat had certain aspects from our storyboard that were possible to create. Another reason why we picked this setting was because of the set decoration. The plain white canvas with little furniture allowed us space to film and made colour of our props (the gun/knife/fake blood) stand out against the colours of the environment.
Sound
Here are soundtracks/sound effects that we may use in our opening sequence as influences. Due to no dialogue in our opening sequence, sound effects will be crucial in our opening sequence to emphasise the genre of the film. We will specifically give an example and analyse which parts of the soundtracks will suit different scenes of our film:
These are soundtracks that we may use during our opening sequence
1)
From about 0:11, this will most suit the scene where the victim enters the house, as it has a fast background build up beat which accentuates that something serious has just happened.
From about 1:41 to 1:59, this will be suitable in the scene where the hitman is introduced, when he pulls out the gun. This is because the momentum of the background beat slows, which emphasises suspense and fear.
From about 0:00 to 0:09, this could be used when the hitman is aiming his gun at the victim.
Around 4:07 to 4:15 could be used when the hitman shoots the victim and walks towards him.
2)
3)
4)
These are ideas of sound effects of when the gun (prop) is going to be used in our opening sequence:
1)
2)
3)
4)
Footsteps sound effect:
Thursday, 14 February 2013
Costume
Here we looked at other films for potential influences in terms of costume, which relates to the roles of our characters.
We started small and immediately both agreed that our killer should wear leather gloves. Leather gloves build an identity and help audiences conclude who the character is by just looking at the gloves. Also it provides a deadly look which makes the character look cool, smooth and sleek.


We started small and immediately both agreed that our killer should wear leather gloves. Leather gloves build an identity and help audiences conclude who the character is by just looking at the gloves. Also it provides a deadly look which makes the character look cool, smooth and sleek.

We took a look at some films where the killers wear leather gloves.

We looked at other films as influences for costumes idea where the characters of the film plays a similar role as the characters in the opening sequence. We specifically looked at characters from other films who featured wearing smart suits, as we believe it emphasises and portrays the role of a hitman/assassin. Below are a few films we looked at from different scenes and shots in which we where interested in:
1) Reservoir Dogs:

2) Goodfellas:

3) Dirty Harry:

4) Quantum of Solace:

We then decided that the best look to go for in terms of costume is the formal look. We agreed that this look was professional and provided a serious attitude.

We stuck to a plain and simple look with not many colours, as colours illustrate vibrance, happiness and many other positive emotions and not the serious/cool look we were going for.
Filming Schedule
We created a film schedule so that we would know approximately how long is needed for each scene, involving what each characters costume and the props & kit involved in each scene.

At the end of filming, we believe we followed the filming schedule fairly well. Some scenes took slightly longer than we thought and some took slightly shorter. Despite having some scenes that consumed additional time such as organising props and costume etc. we believe that this wasn't a major issue due to the fact that we both were casters in our opening sequence.
Tuesday, 5 February 2013
Props
We need certain props to be able to create a realism in the opening sequence. Some props that we needed were:
We needed fake blood to create certain effects in our film. We looked at the use of fake blood in different films and then tried to find a brand of fake blood which emulated, the fake blood we saw in films. We looked at films which used fake blood really well like American Psycho, Dawn of the Dead and Resevoir Dogs.


Fake Guns and Knives
A film in a genre like ours always needs weapons to emphasise different characteristics which represent themes in our films. Weapons like guns and knifes are needed in our film mainly due to our film being in the crime/action genre, and typically these films have weapons like these in them. We needed the weapons to look real in our film to be able to take the film seriously. We took inspiration from films like Cariltos Way, Hitman and Scream in terms of weapons.


Fake Gun

We believe using these props would help the audience to establish our genre as fake knife and gun are mostly used in our influences such as Godfather, American Psycho and Hitman. This also relates to our theme of violence and crime.
- Fake Guns
- Fake Knife
- Plain White Mask
- Fake Blood
We needed fake blood to create certain effects in our film. We looked at the use of fake blood in different films and then tried to find a brand of fake blood which emulated, the fake blood we saw in films. We looked at films which used fake blood really well like American Psycho, Dawn of the Dead and Resevoir Dogs.


A film in a genre like ours always needs weapons to emphasise different characteristics which represent themes in our films. Weapons like guns and knifes are needed in our film mainly due to our film being in the crime/action genre, and typically these films have weapons like these in them. We needed the weapons to look real in our film to be able to take the film seriously. We took inspiration from films like Cariltos Way, Hitman and Scream in terms of weapons.


PlainWhite Mask
We wanted our killer to have a mask but stay unique. We looked at films who had unique simple masks which still created fear. After looking at examples like Scream, Friday the 13th and Saw and decided to go with a plain white mask as we believed as the lack of colour and emotion given from the mask makes our cold hearted killer even more horrifying.


Fake Blood

Fake Knife

Fake Gun

We believe using these props would help the audience to establish our genre as fake knife and gun are mostly used in our influences such as Godfather, American Psycho and Hitman. This also relates to our theme of violence and crime.
Subscribe to:
Posts (Atom)